Team, API Keys & Webhooks
Invite teammates with the right role, manage API keys for the public REST API, and subscribe your systems to claim webhook events.
These three settings pages live under Admin → Settings and govern who can operate your project and how outside systems integrate with it. Team controls human access, API keys manage machine credentials for the public REST API, and Webhooks push your project's claim events out to your own infrastructure.
Team
Invite teammates and assign one of four roles, from read-only Viewer up to Owner.
API keys
Mint and manage per-project keys, then call the live public REST API with them. See the API Reference.
Webhooks
Subscribe your backend to claim events (claim.confirmed / claim.failed), verified with an HMAC signature.
Team
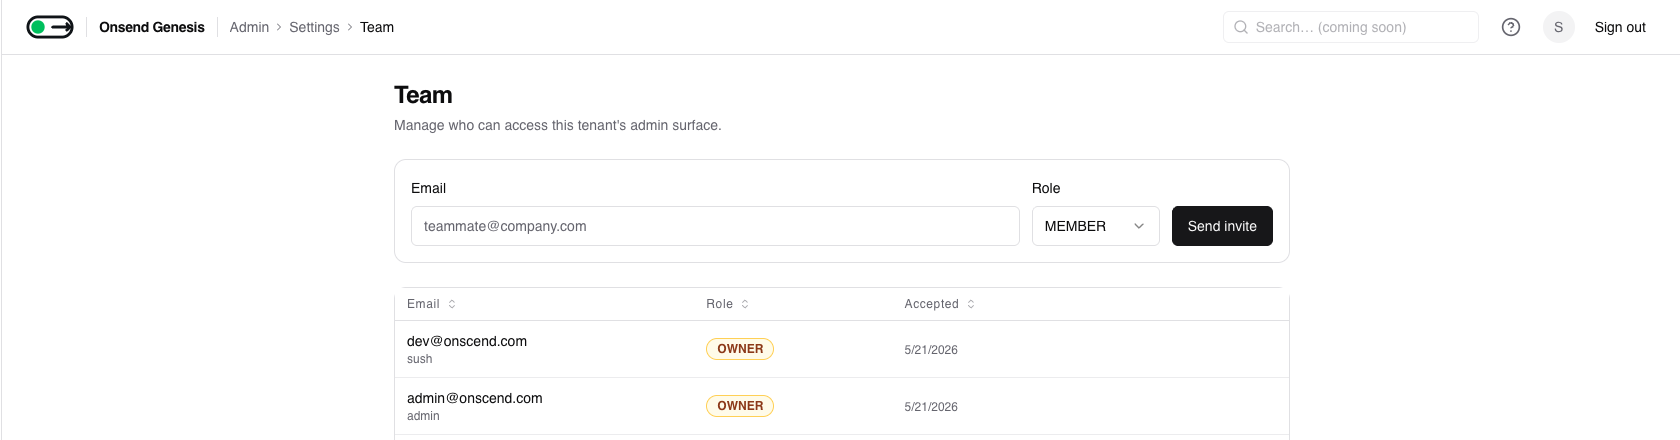
Open Settings → Team to see everyone who can access your project's admin surface, their role, and whether they've accepted yet.
Inviting a teammate
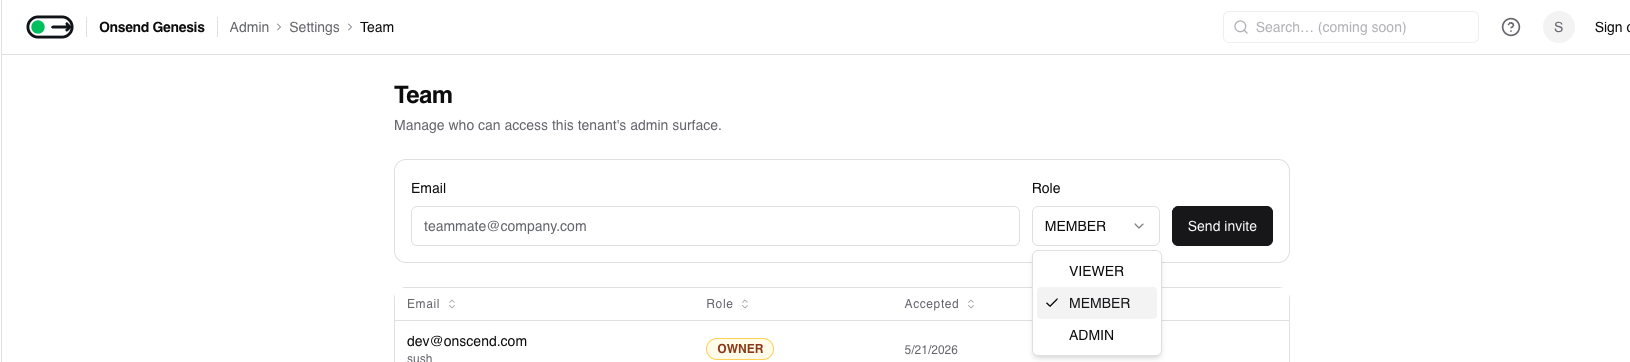
Enter the teammate's email, pick a role, and click Send invite.
The invitee needs an Onsend account first (V1)
In V1 you can only invite someone who already has an Onsend admin account.
If their email has no account yet, the invite returns an error asking them to
sign up at /sign-up first, then you retry. (A token-based
invite-by-link flow, where the link itself creates the account, is on the
roadmap.) Once invited, they appear as pending until the first time they
sign in.
The invite emails the teammate a link to the admin dashboard. Email is best-effort: if the send fails, the membership is still created and the teammate can sign in to pick it up.
Roles
Every teammate holds exactly one role. Roles are ranked Owner > Admin > Member > Viewer, and you can only assign or modify roles strictly below your own.
| Role | Capabilities |
|---|---|
| Owner | Full control of the project, including team and all settings. There is one Owner (the creator). Owner role can't be assigned, changed, or removed in the dashboard; ownership transfers go through Onsend support. |
| Admin | Manages the project end-to-end: campaigns, users, branding, and the Team, API keys and Webhooks pages. Can invite, re-role and remove Members and Viewers (but not other Admins or the Owner). |
| Member | Day-to-day operator: create and run campaigns, manage users and quests. No access to Team, API keys or Webhooks (those require Admin). |
| Viewer | Read-only across the admin surface. Sees dashboards, campaigns and reports but can't change anything. |
Who can manage the team
Inviting, re-roling and removing teammates all require Admin or higher. Members and Viewers can't open these actions. The Team list itself is visible to any role.
Changing a role or removing someone
In the member list, change a teammate's role with the inline role selector, or click Remove to revoke their access immediately. A few guardrails apply:
- You can't change or remove yourself; a second Admin or the Owner has to do it. This prevents locking the project out of its last operator.
- You can't touch the Owner; that's a support-only operation.
- You can only act on teammates strictly below your own role, and you can't promote anyone to your own role or higher.
Every invite, role change and removal is written to the Audit Log.
API keys
The public REST API is live
Keys minted here authenticate Onsend's public REST API. Pass a key as
Authorization: Bearer onsend_… (or X-API-Key); revocation and expiry take
effect immediately. See the API Reference for endpoints,
authentication, rate limits and payloads. (Per-scope enforcement is not in v1
yet — any valid key for your project can call every v1 endpoint.)
API keys are intended to let scripts, backend services and CI call Onsend on your project's behalf without a human session. Open Settings → API keys (requires Admin) to mint and manage them.
When you mint a key, Onsend shows the full key (formatted onsend_<…>)
once, and stores only a SHA-256 hash plus a short prefix (never the raw
key). Keys can be revoked from the list (a soft-delete retained for audit), and a
revoked or expired key stops authenticating immediately. The exact endpoints,
auth header, rate limits and scopes are documented in the
API Reference.
Webhooks
Webhooks push your project's events to a URL you control, so your own backend can react in real time. Open Settings → Webhooks (requires Admin) to register endpoints.
Claim events today; more coming
Webhook delivery is live for claim lifecycle events
(claim.confirmed / claim.failed), and every delivery is HMAC-signed so you
can verify it came from Onsend (see Verifying the signature below). Other
events you may have seen suggested, such as quest.completed Coming soon /
referral.activated Coming soon, do not fire yet; subscribing to them
delivers nothing.
Register an endpoint
Click New webhook, enter the destination URL and a comma-separated list of events to subscribe to.
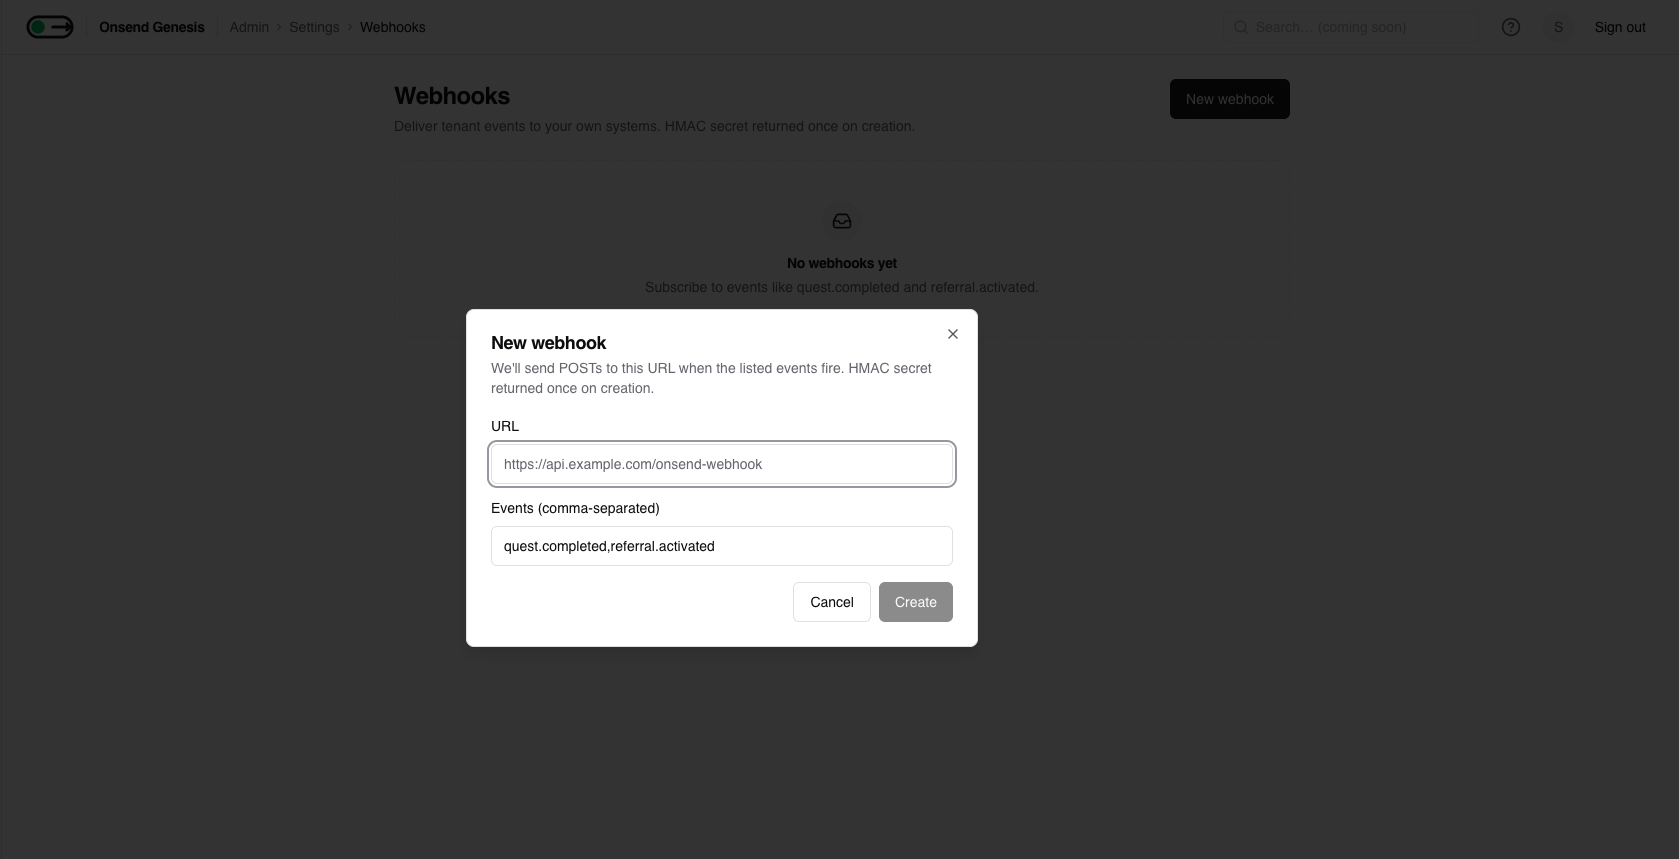
Save the signing secret
On creation Onsend returns an HMAC signing secret (formatted whsec_<…>)
once. Copy it now, because you'll use it to verify that incoming deliveries
genuinely came from Onsend. You can pause (toggle active), edit, or delete a
webhook later from the list.
Event types
Webhook delivery is live for claim lifecycle events only:
| Event | Fires when |
|---|---|
claim.confirmed | A recipient's on-chain claim transaction is confirmed |
claim.failed | A claim transaction fails verification (after retries) |
Claim webhooks need a per-campaign opt-in too (two gates)
Subscribing an endpoint here is necessary but not sufficient: you must also enable the event on the claim campaign itself:
- Subscribe an endpoint to the event here, in Settings → Webhooks.
- Enable it on the campaign: open it under Admin → Claim Campaigns,
find the Webhook events card, tick
claim.confirmed/claim.failed, and save.
Until both are set, your endpoint appears in the list but never delivers.
Coming soon: only claim events fire today
The events field accepts any string, but only the two claim events above are
delivered today. quest.completed, referral.activated and others are
recorded internally but do not fire webhooks yet, so don't rely on them.
Payload
Each delivery is a JSON POST. Claim events carry:
amount is the raw on-chain token amount: a decimal string in base units, so
divide by 10^decimals for the human value. type matches the
x-vandergrid-event-type header.
Verifying the signature
Every delivery is a POST with a JSON body and these headers:
| Header | Value |
|---|---|
x-vandergrid-signature | Hex-encoded HMAC-SHA256 of the raw request body, keyed with your whsec_ secret |
x-vandergrid-event-type | The event type (e.g. claim.confirmed) |
To verify, compute the HMAC-SHA256 of the raw request body with your secret
and compare it (in constant time) to x-vandergrid-signature:
Sign over the raw body
Compute the HMAC over the exact bytes Onsend sent: read the raw request body before any JSON parse + re-serialize. Re-serializing can reorder keys or change whitespace and break the comparison. Reject any request whose signature doesn't match.
Delivery & retries
A successful delivery is any 2xx response. Onsend does not follow redirects, so your endpoint must respond directly. Anything else (a non-2xx, a timeout, a connection error) is treated as a failure and retried with exponential backoff:
| Attempt | Wait before this attempt |
|---|---|
| 1 | immediate |
| 2 | 1s |
| 3 | 5s |
| 4 | 30s |
| 5 | 5min |
| 6 | 30min |
| 7 | 2hr |
| 8 | 6hr |
After 8 failed attempts the delivery is marked given up and no longer retried. Make your receiver idempotent, since a delivery can legitimately arrive more than once (e.g. when your endpoint 2xx's but the connection drops before Onsend records it).
Health at a glance
The webhook list shows each endpoint's last-delivered time and consecutive failure count, so you can spot a broken endpoint before deliveries are given up on.
This page covers the dashboard surfaces. The full per-endpoint REST reference, covering every route, request shape, scope and event payload, is documented separately: see the API Reference.